Week 3 - Anatomy Sculpting Practice
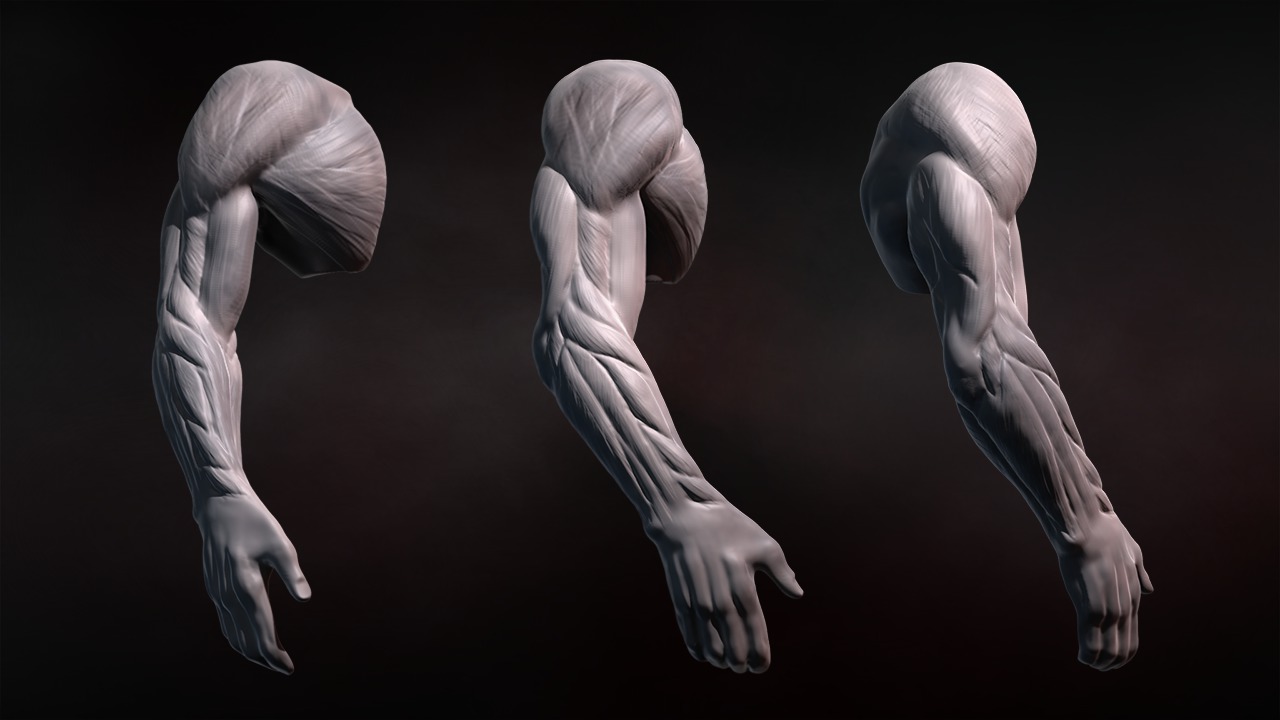 |
| Human Anatomy sculpt: SOURCE |
Please complete Mr. Webb's Daily Check-In >>>HERE
OBJECTIVE
- Complete the Anatomy Cube exercises, applying the digital sculpting workflows and strategies for generating realistic human anatomical forms by manipulating geometry.
- Referencing human scale forms for modeling hands and feet to produce realistic and stylized versions of models for 3D Printing
- Learn the rules of safe operation and process for 3D Printing on the Lulzbot TAZ 6 FDM printer, as well as the Formlabs SLA Form 2 printers.
TASK 1 - Anatomy Cube 4x
Students will be evaluated using the EGI scoring standards rubric, which includes the following criteria:
Technical Skill: the student's ability to use the tools and techniques of SculptGL effectively
Anatomical Accuracy: the student's ability to accurately depict the human anatomy in their sculptures
Creativity: the student's ability to add their own unique style and interpretation to their sculptures
Craftsmanship: the student's attention to detail and the overall quality of the final sculpture
Learning Targets:
Students will be able to use SculptGL to digitally sculpt a cube with human anatomy
Students will be able to accurately depict the human nose, mouth, ear, and eye in their sculptures
Students will be able to improve their technical skills, anatomical accuracy, creativity, and craftsmanship over multiple attempts
Students will be able to use the crease tool to carve their names and date on the top of the cube.
TASK 2 - Foot Sculpt
Draw orthographic sketches (front, side, top views) of a human foot, based upon collected reference photos. Assemble a base mesh, using Zspheres. Refine the base mesh into a realistic human anatomical model, with primary, secondary and tertiary forms (including joints, tendons, wrinkles, skin folds, and other details).
FOR CREDIT-Export OBJ, Save ZTool - upload both to Schoology, and OBJ to Sketchfab account
TASK 3 - Hand Sculpt
Draw orthographic sketches (front, side, top views) of a human hand, based upon collected reference photos. Assemble a base mesh, using Zspheres. Refine the base mesh into a realistic human anatomical model, with primary, secondary and tertiary forms (including joints, tendons, wrinkles, skin folds, and other details).
FOR CREDIT-Export OBJ, Save ZTool - upload both to Schoology, and OBJ to Sketchfab account
TASK 4 - 3D PRINTING: Safety, File Prep, Post Process
- Read safety documents
- Watch 3D Printing Process videos
- Take the 3D Printing Saftey exam (score 90% or above) - Google Exam here<<
- Prepare your i. Anatomy Cube, ii. Foot, and iii. Hand sculpts for 3D Printing as FDM and SLA prints.
- Print and post-process copies of your 3D model - submit physical copies to Mr. Webb
----------------------------
REFERENCE MATERIALS
- Laika 3D Printing enables our Animation
- How do 3D Printers Work? - Educational Video
